1. Getting started
Opening it#
Go to editor.plota.live. There is nothing to install, no account to create and no sign-in step — the page loads and you are in the editor.
It works offline once loaded, and it keeps working on a plane: the whole thing runs in your browser. Nothing you draw is uploaded anywhere. Diagrams you save live in that browser's own storage, and the Export menu writes real files to your disk whenever you want a copy somewhere else.
Any current browser will do. Chrome, Edge, Firefox and Safari are all fine; the only features that ask for anything unusual are the optional in-browser AI models, which want WebGPU.
Because everything is local, clearing your browser's site data for
editor.plota.liveclears your saved diagrams with it. Export anything you want to keep — see Import and export.
The window#
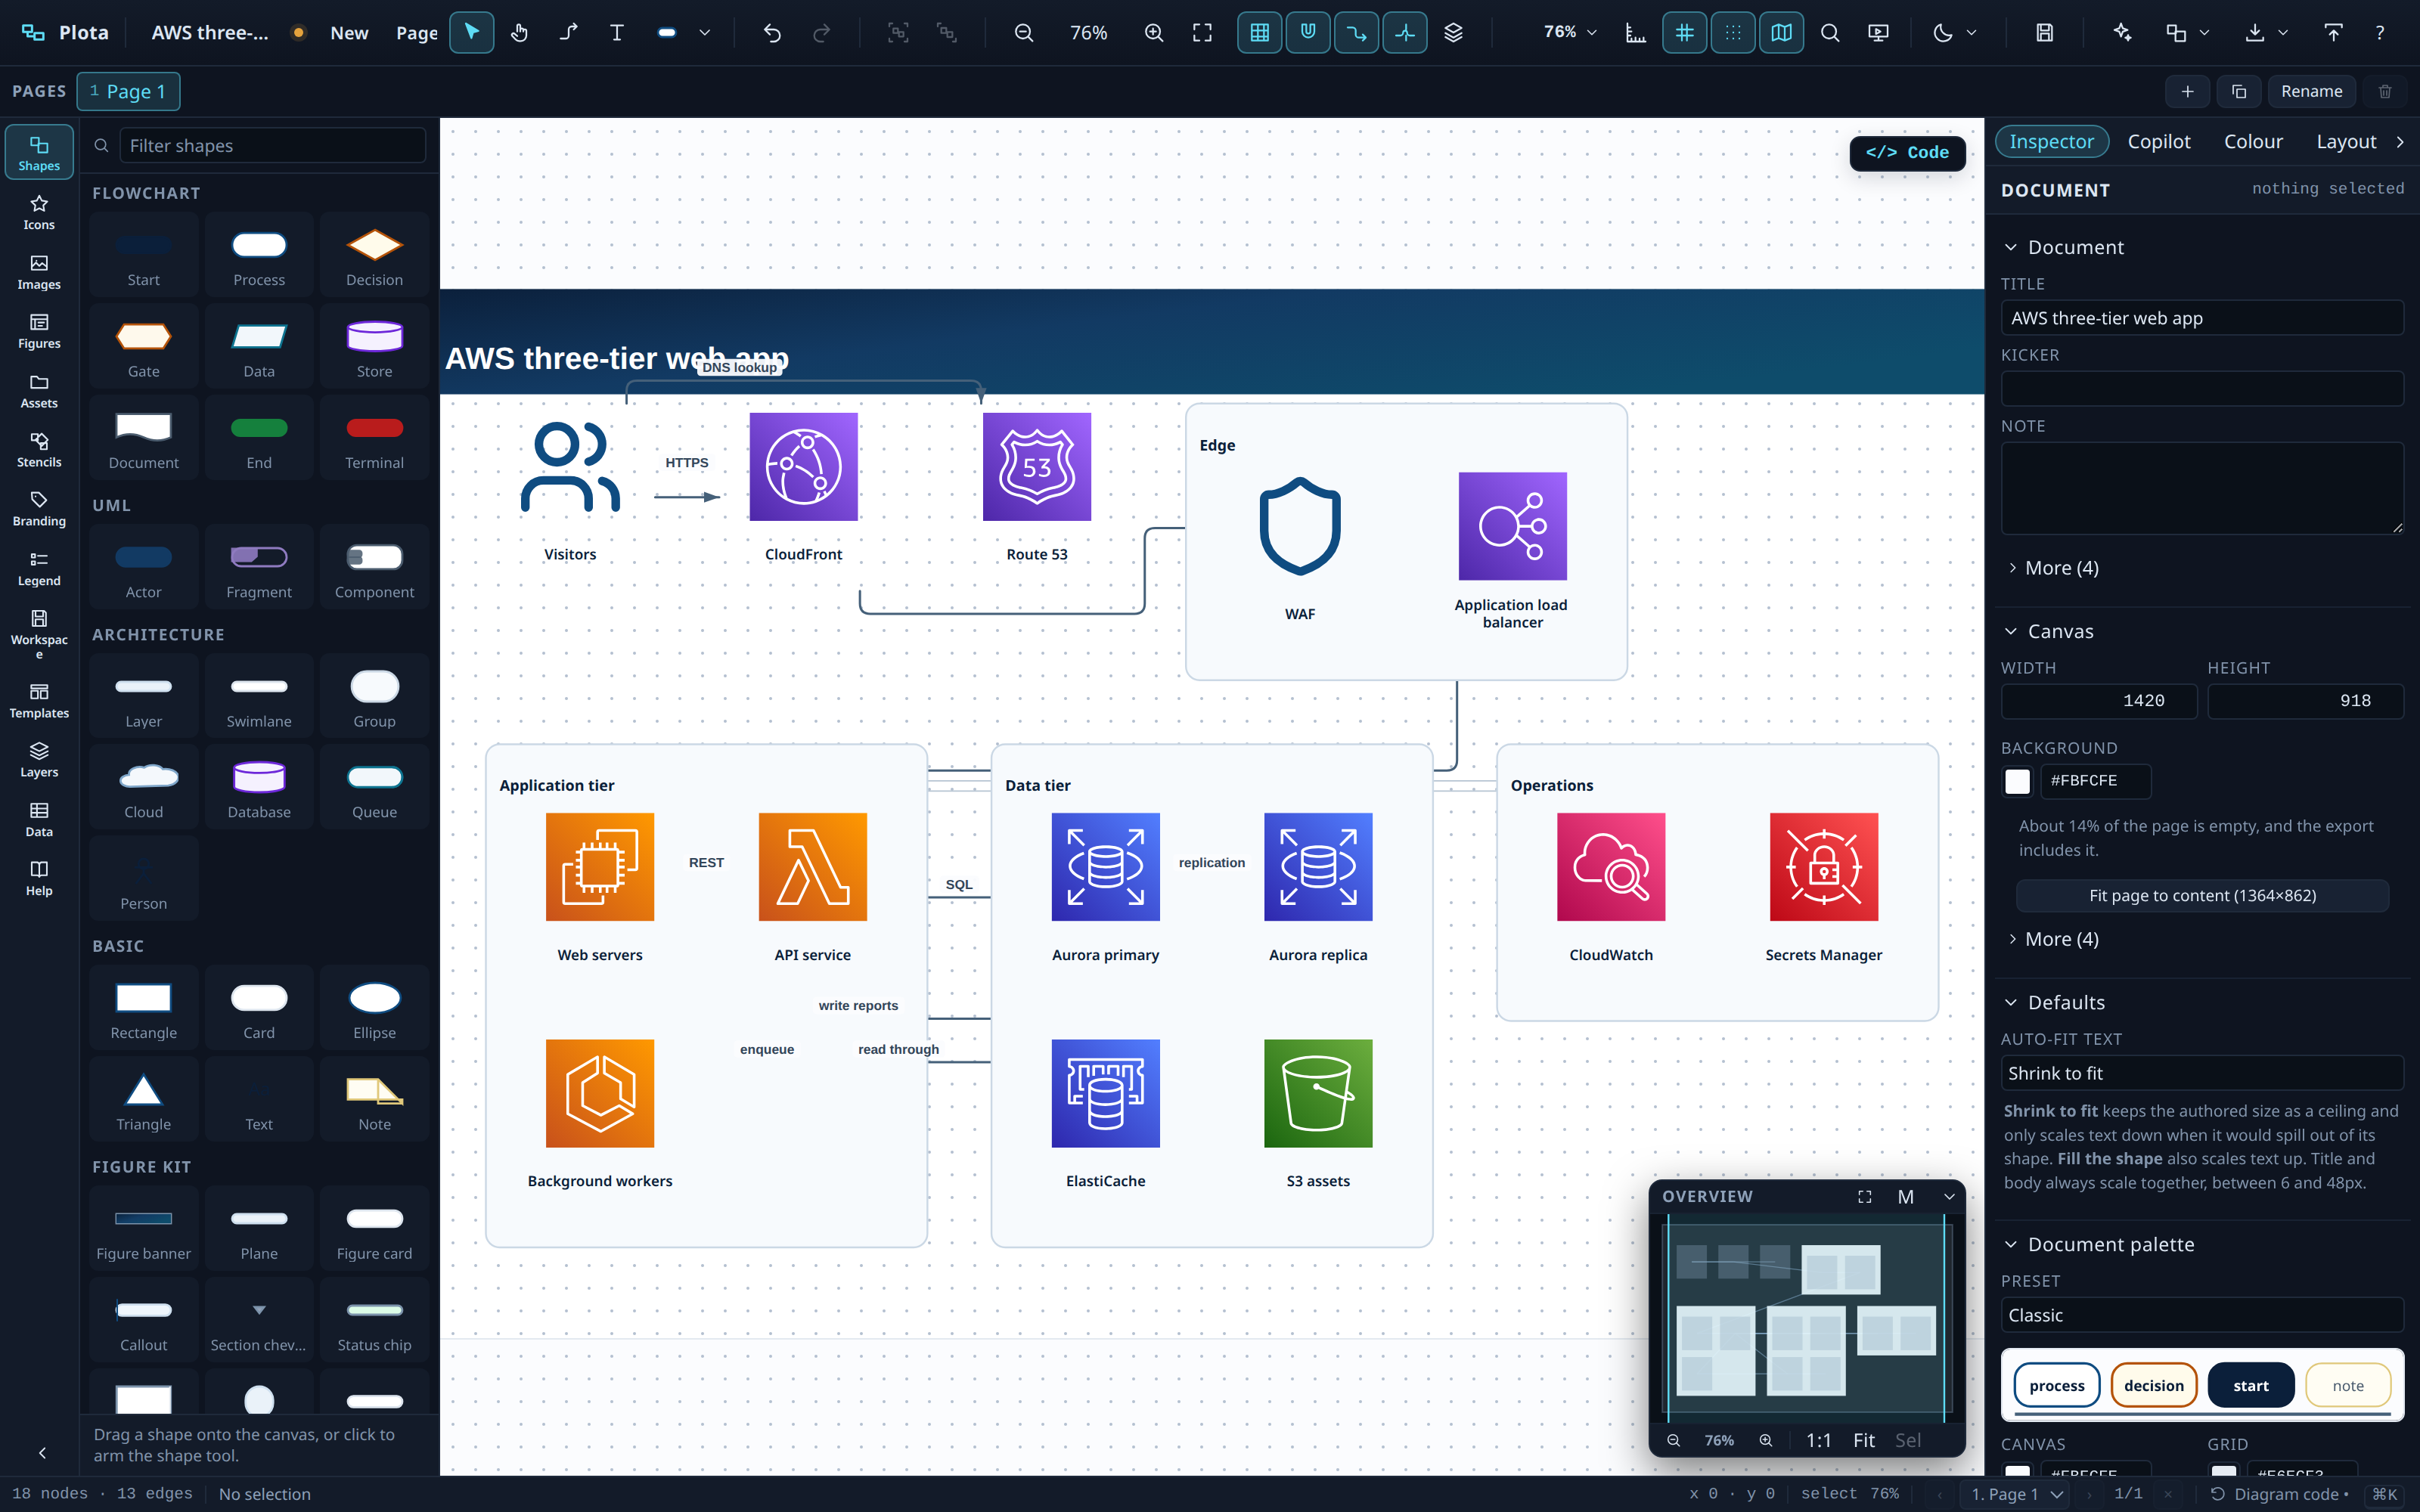
| Region | What is in it |
|---|---|
| Toolbar | Document title · New · Page · tools (Select / Pan / Connect / Text / Shape) · undo/redo · zoom · grid, snap, Smart Route, Crossovers · view controls (zoom presets, rulers, guide snap, minimap, find, dark canvas, presentation) · Save · AI · Assets · Export · Import · ? (help) |
| Page strip | One tab per page of the document, plus Rename |
| Left panel | Assets, Shapes, Stencils, Icons, Images, Figures, Layers, Data, Help — press [ to collapse it |
| Canvas | The document. Hover a shape for ports, right-click anything for a menu built for that target |
| Right rail | Inspector and Copilot — press ] to collapse it |
| Status bar | Node/edge counts, the current selection, the pointer position in document coordinates, the active tool, zoom, the page selector, the undo state, and a ⌘K reminder |
The left panel's tab list scrolls sideways; features register their own tabs, so the set you see depends on what has loaded.
The first five minutes#
- Put a shape down. The left panel opens on
Shapes. Drag one onto the canvas, or click it to arm the shape tool (S) and then click the canvas. - Connect it. Hover a shape: eight ports appear on its outline
(
n ne e se s sw w nw). Drag from one onto another shape. Drag into empty space instead and a new shape is created, connected, and put straight into text editing. - Type into it. Double-click a shape, or select it and press
Enter. The first block is the label, the block under it is the description;Tabmoves between them. Labels understand**bold**,*italic*,_underline_,~~strike~~,`code`and[text](url). - Let it tidy itself.
Rtoggles Smart Route (connectors go around shapes instead of through them),Jtoggles crossover hops. Select several shapes and right-click →Arrangeto align, distribute and match sizes. - Get it out.
Export ▸ Export…(orCtrl/⌘ ⇧ E) opens the dialog with padding, PNG scale, transparency, header/footer, page scope and a live preview.
Two things worth learning early#
The command palette — Ctrl/⌘ K. Every command in the app, fuzzy-searched:
tools, the 25 palette shapes as Insert … entries, the 31 figures, arrange and tidy actions,
stencil and ERD helpers, export formats, view toggles, style and theme commands,
and every AI action. If you cannot find a control, type what you want here.
The context menu — right-click. It is not one menu: it is built for what you clicked (empty canvas, one shape, several shapes, a connector, several connectors, a mixed selection, a container, an image, an ERD entity, a table, or a page tab), so the entries you see are the ones that apply.
Help inside the app#
F1, ?, the ? button at the right of the toolbar, or Ctrl/⌘ K → “Help”
opens the Help tab in the left panel.
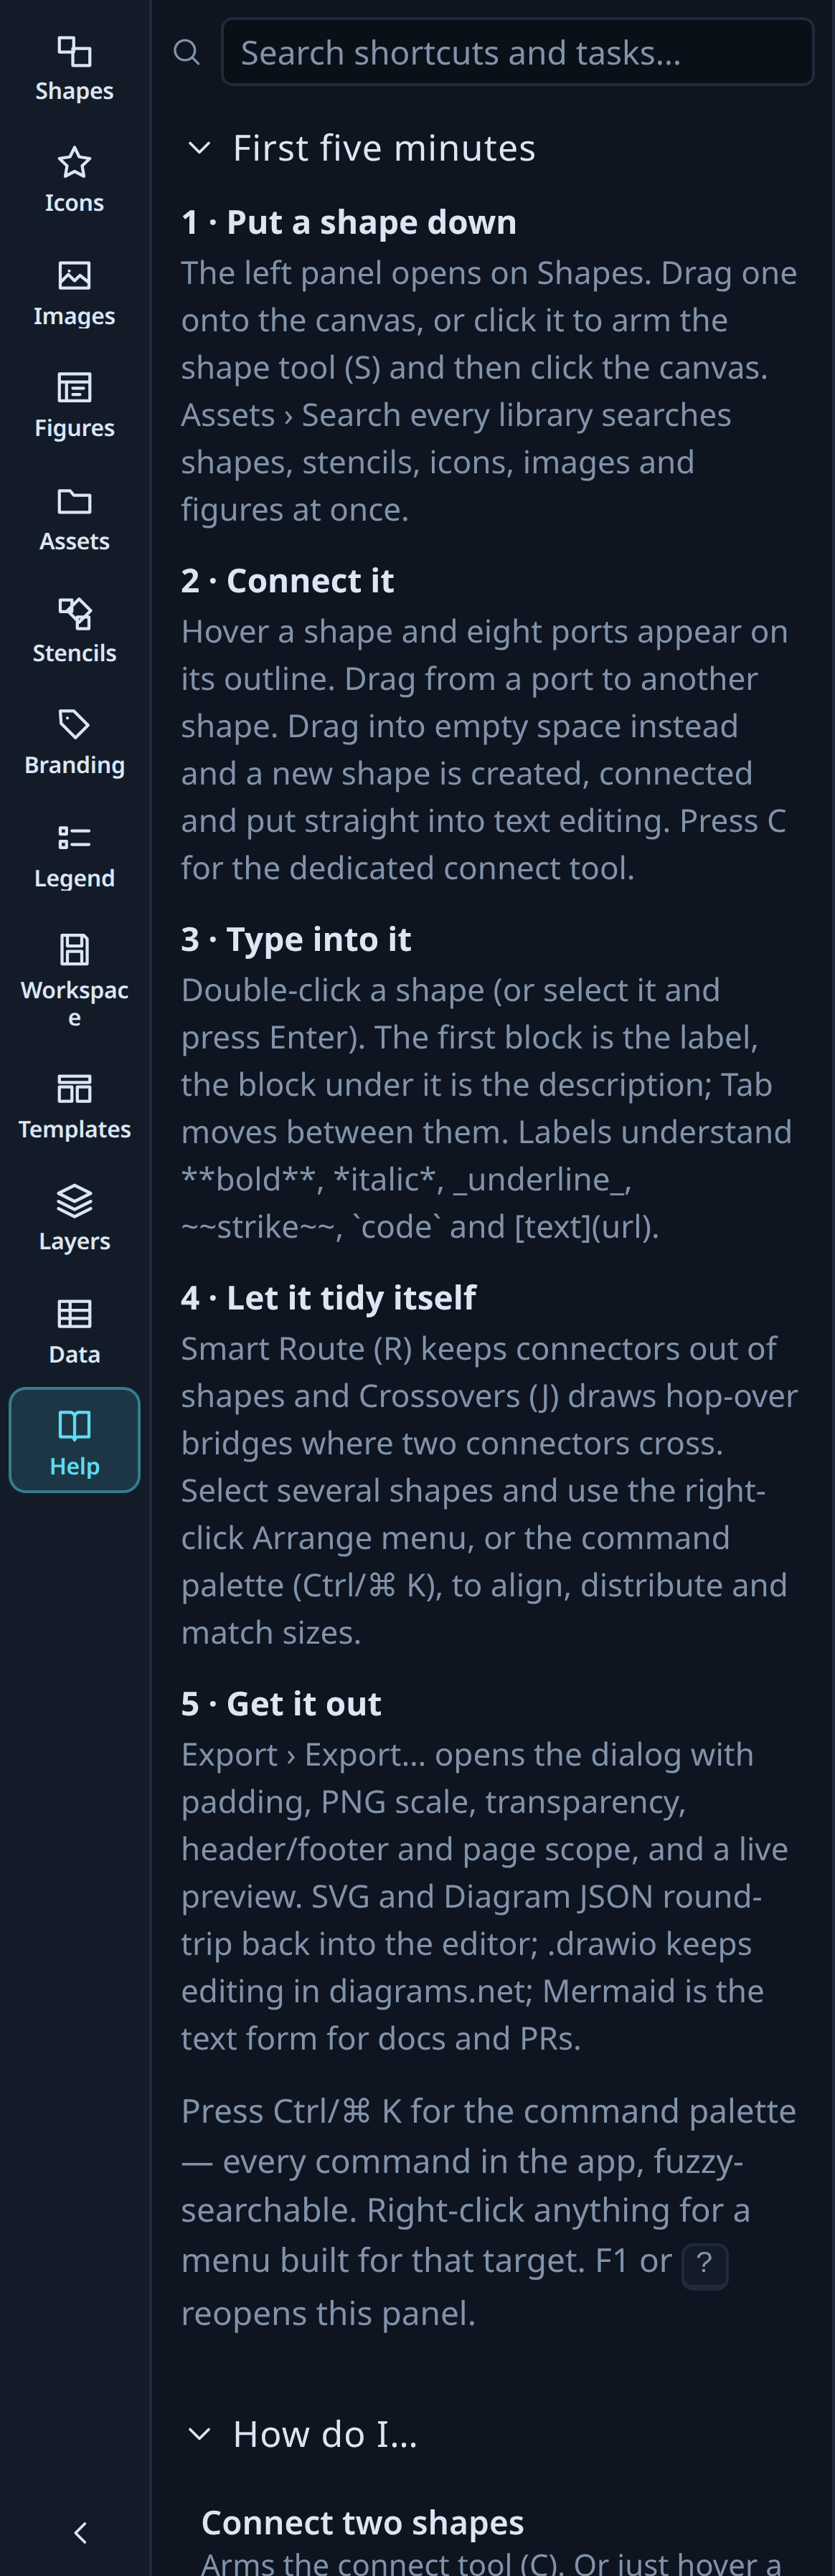 |
It has the walkthrough above, a “how do I…” list where clicking an entry actually runs the command (and tells you why when it cannot — “select a shape first”), a searchable keyboard reference generated from the app's own shortcut table, and a what's-new section.
The search box filters both lists at once:
Where things are saved#
Ctrl/⌘ S— Save writes the whole multi-page document into browser storage; it then appears underFigures ▸ My diagrams. This is not a file.Export ▸ Plota JSONwrites a real.jsonfile that round-trips back in with every page, layer and style intact.- The dot next to the document title is filled while there are unsaved changes.